

 on March 6, 2014.")
Adding a YNU Mail account to Android
Emails sent to YNU Mail addresses can be checked using Android devices as follows.
Note that the actual screens may differ slightly depending on the device used.
Use the built-in Android mail app
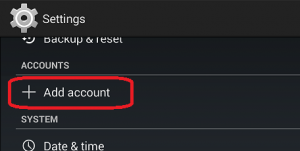
- Tap Settings > Accounts > Add account > Email. This application might be named Mail on some versions of Android.
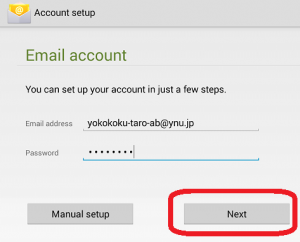
- Type your full YNU Net Address, for example yokokoku-taro-ab@ynu.jp, type your modified password instead of the initial password(Before setting up email on Android, sign in with the Net Address via a web browser and change your password from the initial password.), and then tap Next.
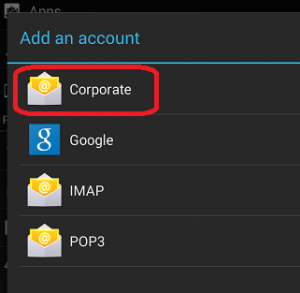
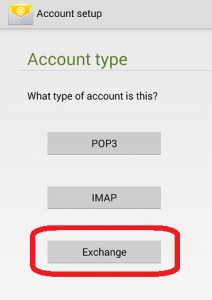
- Select the Exchange option.
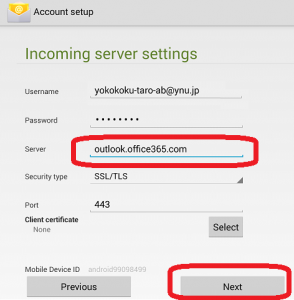
- Type outlook.office365.com in [Server] and tap [Next].
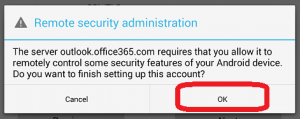
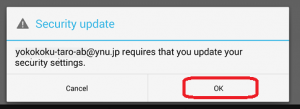
- You might receive a message about additional security features. Select OK to continue.
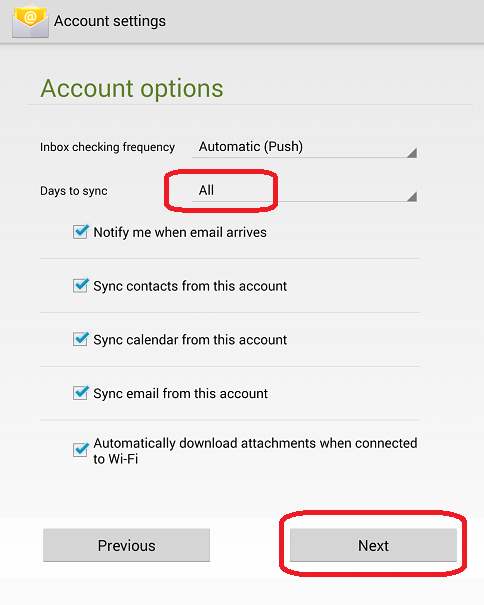
- The [Account settings] window is displayed. If you want to synchronize all emails, select ‘All’ for [Days to sync]. Note: By default, emails for the previous week are displayed.
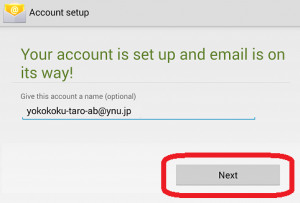
- Enter the account name and name to display when you send emails to others. Select [Next] to complete email setup and start using the account.
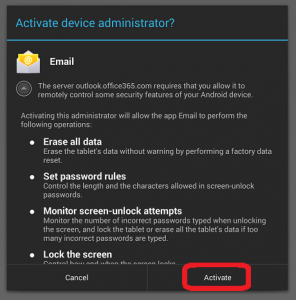
- Select [Activate] or [OK].
- Open the email application to check whether the account has been added successfully.
- For more detailed setup instructions and the latest setup information, check the Office 365 website.
- Sign in to Office 365 and click [Settings](gear icon) ⇒ [Office 365 settings]. Then, click [Software]⇒ [Phone & tablet] on the left. Select a phone or tablet. Click [Access email].