

 on March 6, 2014.")
Installing Apex One on Mac
If you are using the retail version of your security software, you do not need to install Apex One.
Preparation
If you have installed security software such as a trial version or an unused retail version (Norton, McAfee, etc.), uninstall it in advance and restart your PC.
The uninstallation method differs depending on the product, so please check for yourself.
Installation
- The download site has a PDF file called [apexone-download-site-20220325.pdf], and when you open this PDF file, you will see the URL of the installation package. Click to download.(
 :Install)
- You can install / uninstall the MAC version of Apex One from off-campus.
- Distribution of install / uninstall packages should be restricted to staff and students only, so it is now available for download via the Office 365 OneDrive share.
- Click tmsminstall.pkg in the downloaded file to install it.
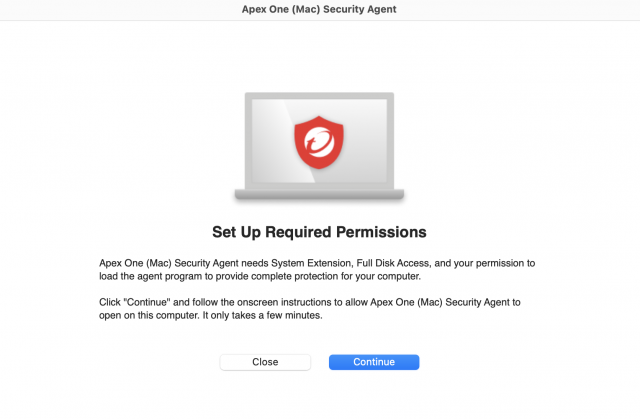
- If the following screen is displayed, click [Continue] and set the required permissions.
 Operation example (for Big Sur 11 / Monterey 12)
- Follow the instructions on [Allow System Expansion] screen to make the settings.
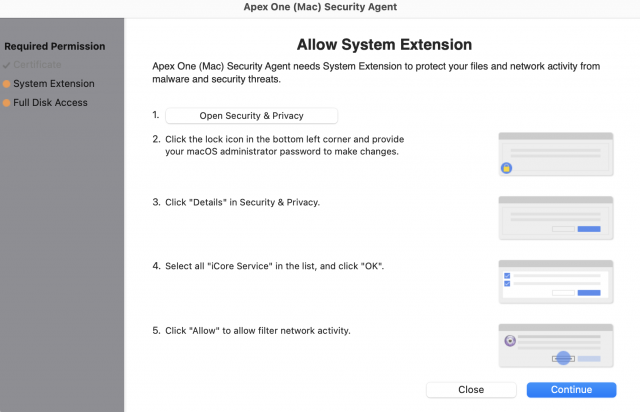
- Open [Security & Privacy].
- Click [Details…] next to “Some system software requires your attention before it can be used.”.
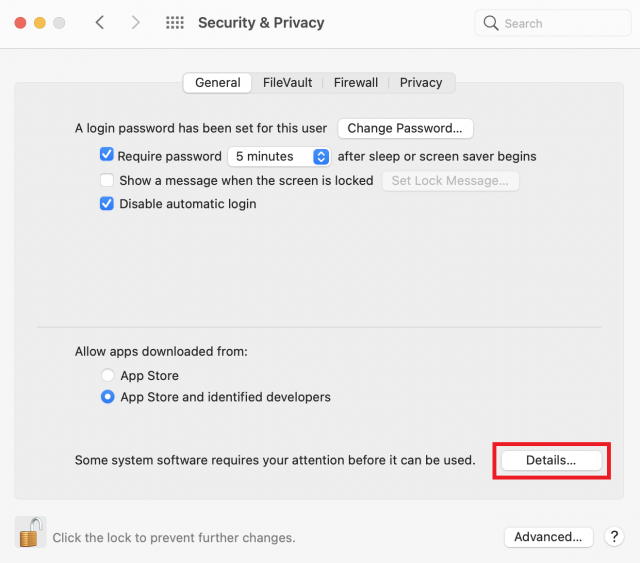
* Click the lock mark at the bottom left of the screen to unlock it.
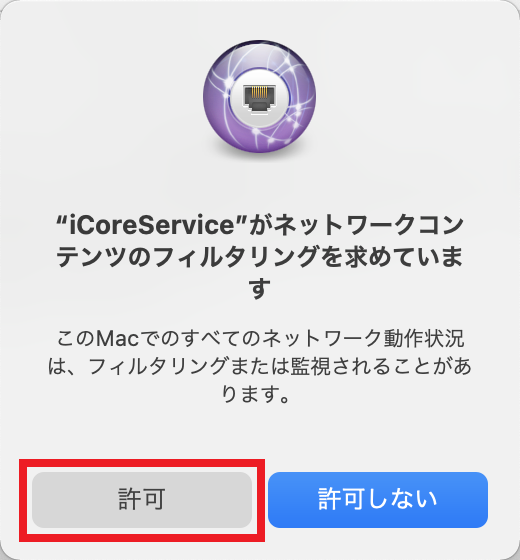
* If you do not see [Allow System Extensions] screen (if checked with the required permissions), skip this step. - Select all [iCore Service] items from the list and click [OK].
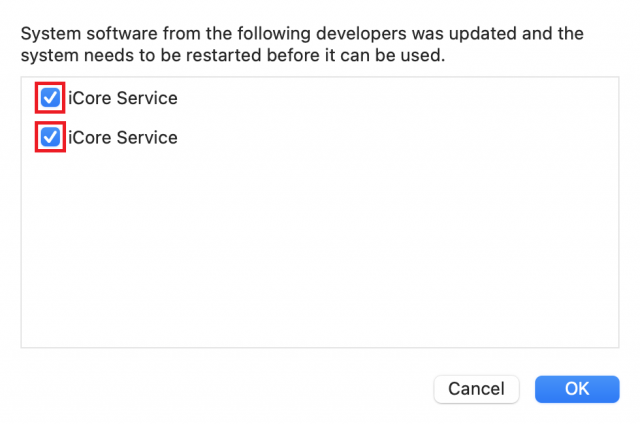
- The message “iCoreService”がネットワークコンテンツのフィルタリングを求めています” means “iCore service wants to filter network content”, so click [
 :Allow] .
- Return to [Allow System Expansion] screen and click [Continue].
- Steps 7-13 should only be performed if they are displayed.
Follow the instructions on [Allow Full Disk Access] screen to make the settings.
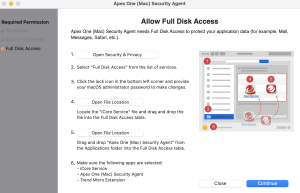
- Open [Security & Privacy].
- Open [Privacy] tab and click the lock mark at the bottom left of the screen to unlock it.
- Return to the [Allow Full Disk Access] screen and click [Open File Location] in 4 and 5.
- Drag and drop the displayed [iCoreService] and [Trend Micro (Mac) Security Agent] to the [Full Disk Access] list.
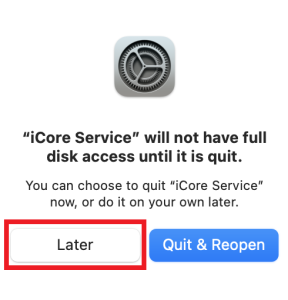
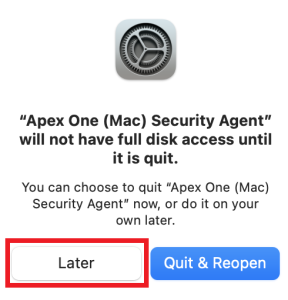
When the following screen appears, click [Later].
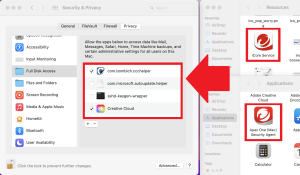
- Make sure that [iCore Service], [Trend Micro (Mac) Security Agent], and [Trend Micro Extension] are displayed in the [Full Disk Access] list, and that the check box is selected.
If the check box is unchecked, select it.
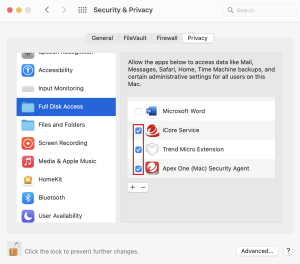
- Close [Security & Privacy] screen and click [Continue] on [Allow Full Disk Access] screen.
- Follow the instructions on [Allow System Expansion] screen to make the settings.
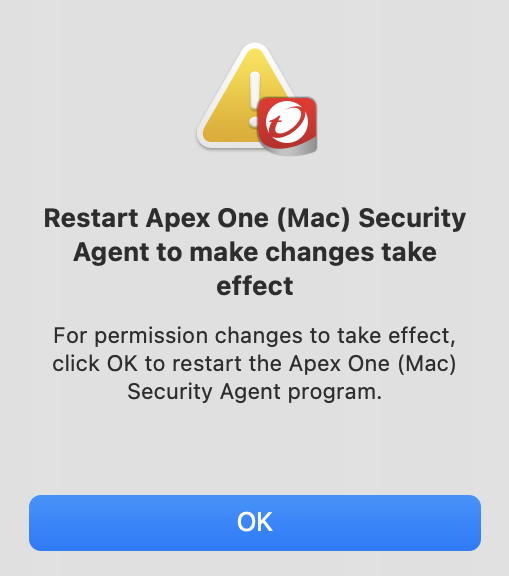
- Click [OK]to restart the Security Agent automatically.
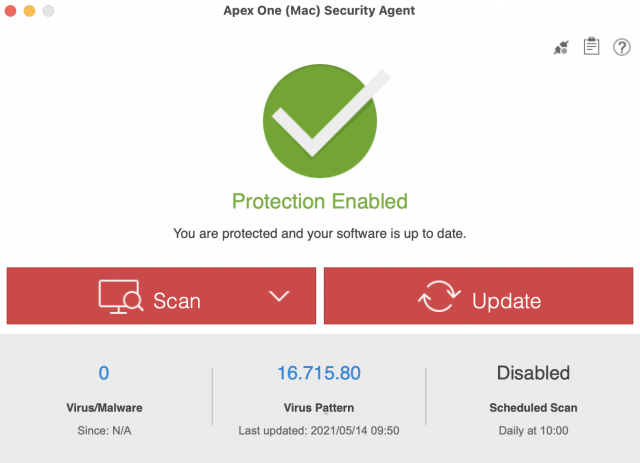
- When the installation is complete, the pattern file will start updating. Please wait about 5 minutes while connected to the network. When the following screen is displayed, the process is complete.
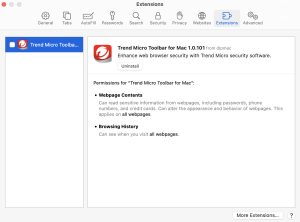
Using the Trend Micro Toolbar for Mac added to the Safari extension is optional.
Uninstallation
- The download site has a PDF file called [apexone-download-site-20220325.pdf], and when you open this PDF file, you will see the URL of the uninstaller package. Click to download.(Use this to uninstall ApexOne obtained before 2021/11/11. After downloading, proceed to step 2.
For Mac OS 10.15 (Catarina), please use the following packages. :Uninstall)
- You can install / uninstall the MAC version of Apex One from off-campus.
- Distribution of install / uninstall packages should be restricted to staff and students only, so it is now available for download via the Office 365 OneDrive share.
- Click the downloaded uninstaller.app (catalina: tmsmuninstall.pkg in the folder) to uninstall.
- Restart your PC.
- Open [ Privacy ] tab on [ Security & Privacy ].
- If "iCore Service" and "Trend Micro Extension" are still in the [Full Disk Access] list, select them and delete them with [-].