

 on March 6, 2014.")
Configuring YNU-WiFi on Windows

Perform the following settings to connect to YNU-WiFi or eduroam on Windows.
faculty and staff Please use SSDI [YNU-STAFF-ONLY].
Configuration
For the ID and password, set the YNU login ID and its password.
* When connecting to eduroam, please add "@ynu.ac.jp" to the ID. (Example: b1012345@ynu.ac.jp)
* The setting screen may differ depending on the OS version. The image is for Windows 10.
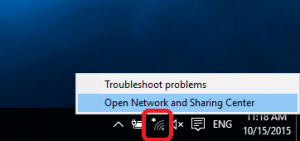
- Open the desktop and right-click the network icon in the taskbar to select [Open Network and Sharing Center]. (If the network icon is not displayed, the wireless LAN adapter may not be working properly.)
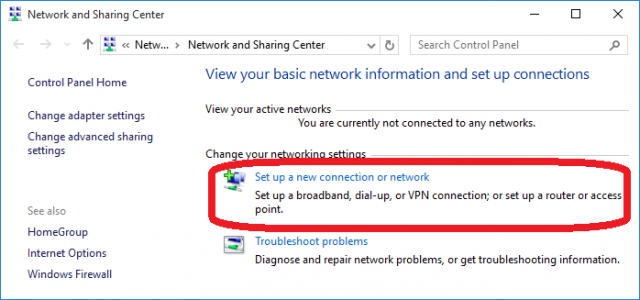
- Once the [Network and Sharing Center] window opens, select [Set up a new connection or network].
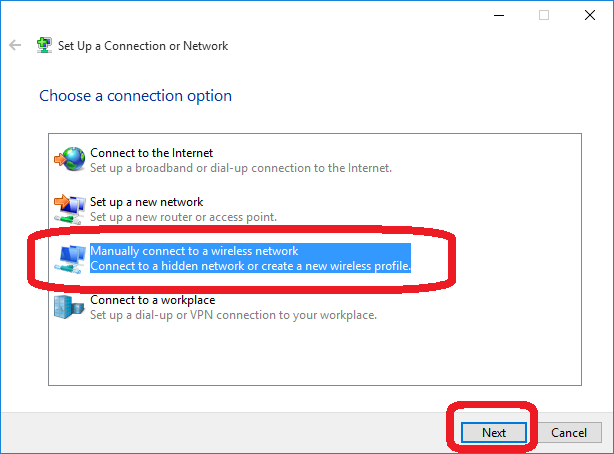
- Select [Manually connect to a wireless network] and click [Next].
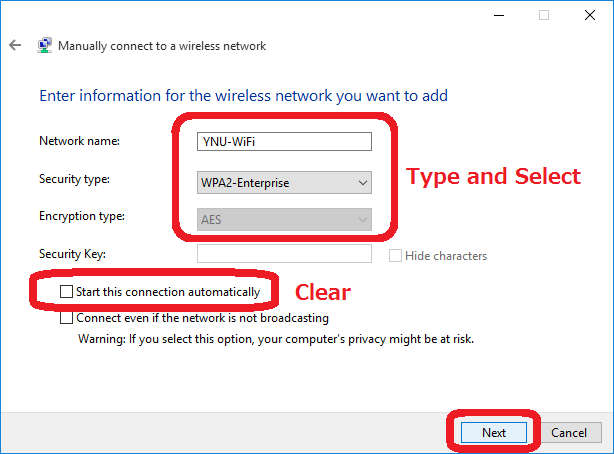
- Type in ‘YNU-WiFi’ as the network name.
The combination of WPA2 Enterprise/AES will be applied for security and encryption.
Clear the ‘Start this connection automatically’ box.
Click ‘Next’.
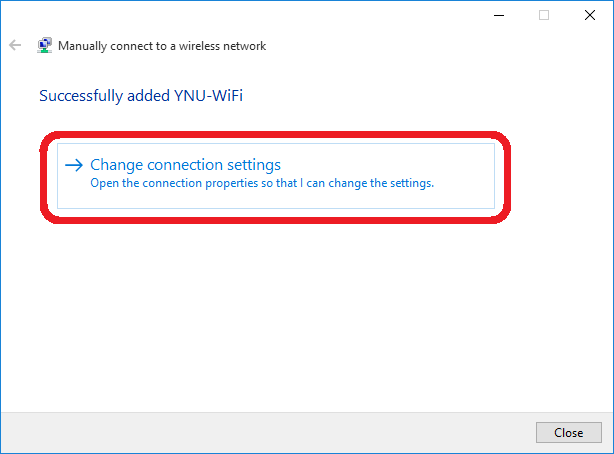
- Once the message ‘Successfully added YNU-WiFi’ appears, select ‘Change connection settings’.
(An error will occur if YNU-WiFi has already been set up. In this case, select ‘Use the existing network’ and go to the step 13.)
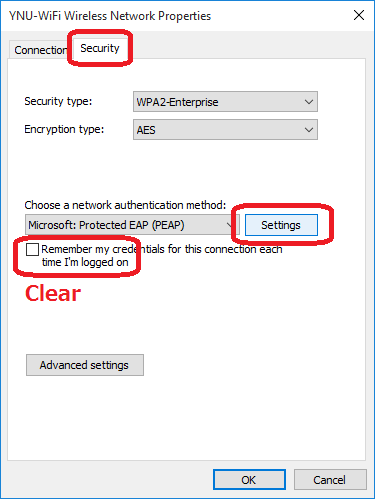
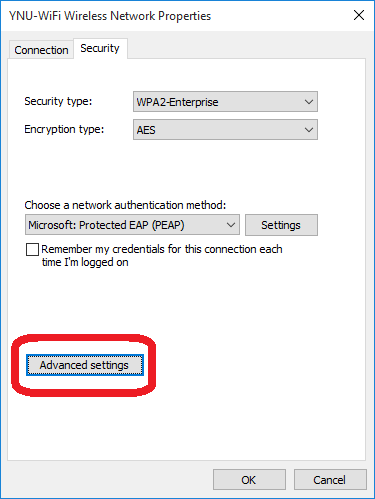
- Select the ‘Security’ tab. Clear the ‘Remember my credentials for this connection each time I’m logged on’ box. Click the ‘Settings’ button after selecting ‘Protected EAP (PEAP)’.
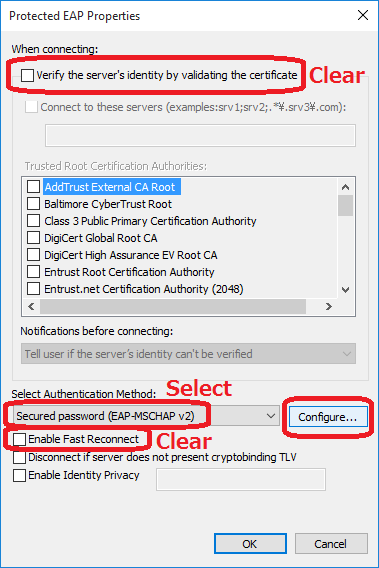
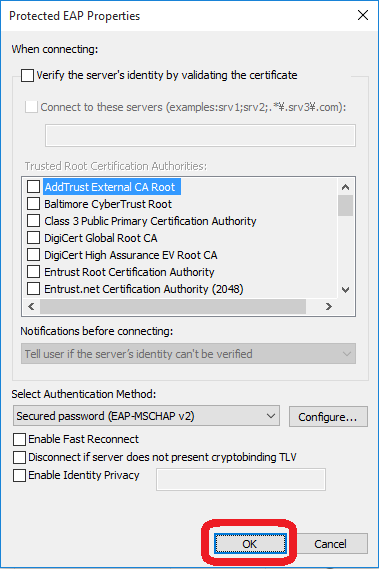
- Clear the ‘Verify the server's identity by validating the certificate’ box under ‘Protected EAP Properties’.
Make sure that ‘Secured password (EAP-MSCHAP v2)’ is selected under ‘Select Authentication method’.
Clear the ‘Enable Fast Reconnect’ box.
Click ‘Configure’.
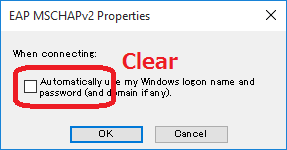
- Clear the ‘Automatically use my Windows logon name and password (and domain if any).’ box and click ‘OK’.
- Close the ‘Protected EAP Properties’ window by clicking ‘OK’.
- Click the ‘Advanced settings’ button.
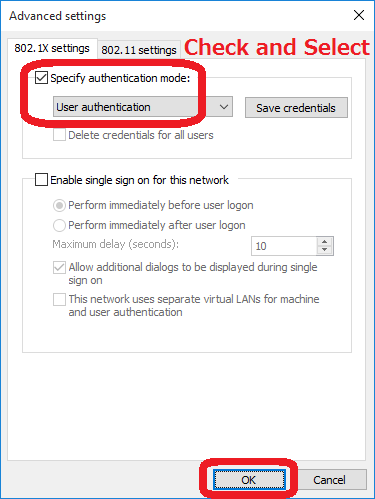
- In the ‘Advanced settings’ window, check the ‘Specify authentication mode’ box and select ‘User authentication’. Click the ‘OK’ button to close the ‘Advanced settings’
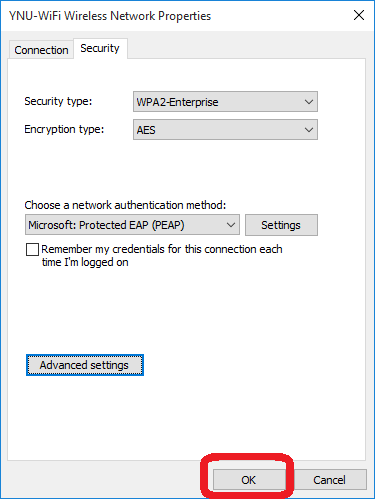
- Click the ‘OK’ button to close the ‘YNU-WiFi Wireless Network Properties’ windows one after another.
- Left-click the network icon in the taskbar. Left-click on ‘YNU-WiFi’ and click ‘Connect’.
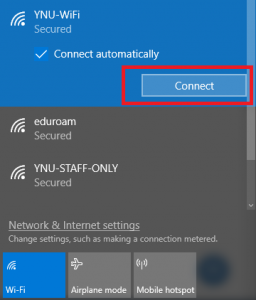
- Sign in with your YNU Login ID.
